Note
This page was generated from circuit-examples//A.Qubits//03-concentric_transmon.ipynb.
Concentric Transmon#
We’ll be creating a 2D design and adding a single Concentric transmon QComponent.
Simple Metal Transmon Concentric object.
Metal transmon object consisting of a circle surrounding by a concentric ring. There are two Josephson Junction connecting the circle to the ring; one at the south end and one at the north end. There is a readout resonator.
[1]:
# So, let us dive right in. For convenience, let's begin by enabling
# automatic reloading of modules when they change.
%load_ext autoreload
%autoreload 2
[2]:
import qiskit_metal as metal
from qiskit_metal import designs, draw
from qiskit_metal import MetalGUI, Dict, open_docs
[3]:
# Each time you create a new quantum circuit design,
# you start by instantiating a QDesign class.

# The design class `DesignPlanar` is best for 2D circuit designs.

design = designs.DesignPlanar()
[4]:
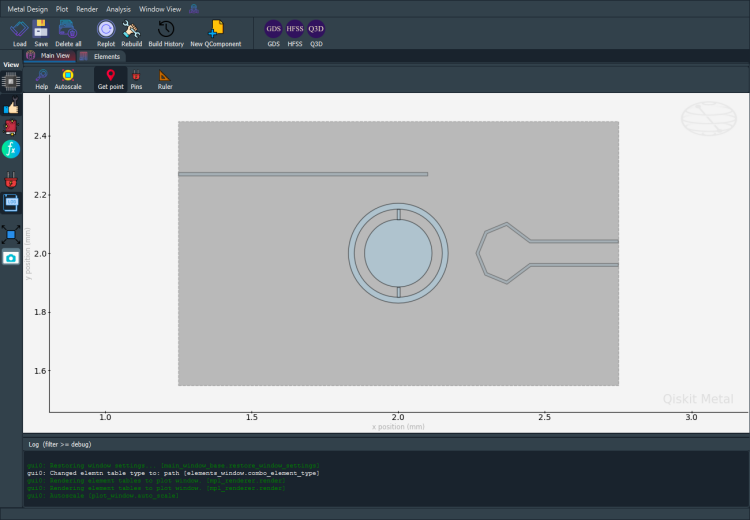
#Launch Qiskit Metal GUI to interactively view, edit, and simulate QDesign: Metal GUI
gui = MetalGUI(design)
A Concentric Transmon#
You can create a ready-made concentric transmon qubit from the QComponent Library, qiskit_metal.qlibrary.qubits. transmon_concentric.py is the file containing our qubit so transmon_concentric is the module we import. The TransmonConcentric class is our concentic transmon qubit. Like all quantum components, TransmonConcentric inherits from QComponent.
[5]:
from qiskit_metal.qlibrary.qubits.transmon_concentric import TransmonConcentric

# Be aware of the default_options that can be overridden by user.
TransmonConcentric.get_template_options(design)
[5]:
{'pos_x': '0um',
 'pos_y': '0um',
 'connection_pads': {},
 '_default_connection_pads': {},
 'width': '1000um',
 'height': '1000um',
 'layer': '1',
 'rad_o': '170um',
 'rad_i': '115um',
 'gap': '35um',
 'jj_w': '10um',
 'res_s': '100um',
 'res_ext': '100um',
 'fbl_rad': '100um',
 'fbl_sp': '100um',
 'fbl_gap': '80um',
 'fbl_ext': '300um',
 'pocket_w': '1500um',
 'pocket_h': '1000um',
 'pos_x': '2.0mm',
 'pos_y': '2.0mm',
 'orientation': '0.0',
 'cpw_width': '10.0um'}
[6]:
# To force overwrite a QComponent with an existing name.
# This is useful when re-running cells in a notebook.
design.overwrite_enabled = True
[7]:
# Place the concentric transmon at (x,y) =(1,2)
concentric_options = dict(
    pos_x = '1um',
    pos_y = '2um',
    layer = '5', # default is 1, this is just for example.
    pocket_w='1500um',  # transmon pocket width
    pocket_h='900um',  # transmon pocket height
)

# Create a new Concentric Transmon object with name 'Q1'
q1 = TransmonConcentric(design, 'qubit1', options=concentric_options)

gui.rebuild()  # rebuild the design and plot
gui.autoscale() #resize GUI to see QComponent
gui.zoom_on_components(['qubit1']) #Can also gui.zoom_on_components([q1.name])
[8]:
#Let's see what the Q1 object looks like

q1 #print Q1 information
[8]:
name:    qubit1
class:   TransmonConcentric
options:
  'pos_x'             : '1um',
  'pos_y'             : '2um',
  'connection_pads'   : {
                        },
  'width'             : '1000um',
  'height'            : '1000um',
  'layer'             : '5',
  'rad_o'             : '170um',
  'rad_i'             : '115um',
  'gap'               : '35um',
  'jj_w'              : '10um',
  'res_s'             : '100um',
  'res_ext'           : '100um',
  'fbl_rad'           : '100um',
  'fbl_sp'            : '100um',
  'fbl_gap'           : '80um',
  'fbl_ext'           : '300um',
  'pocket_w'          : '1500um',
  'pocket_h'          : '900um',
  'pos_x'        : '2.0mm',
  'pos_y'        : '2.0mm',
  'orientation'          : '0.0',
  'cpw_width'         : '10.0um',
module:  qiskit_metal.qlibrary.qubits.transmon_concentric
id:      1
[9]:
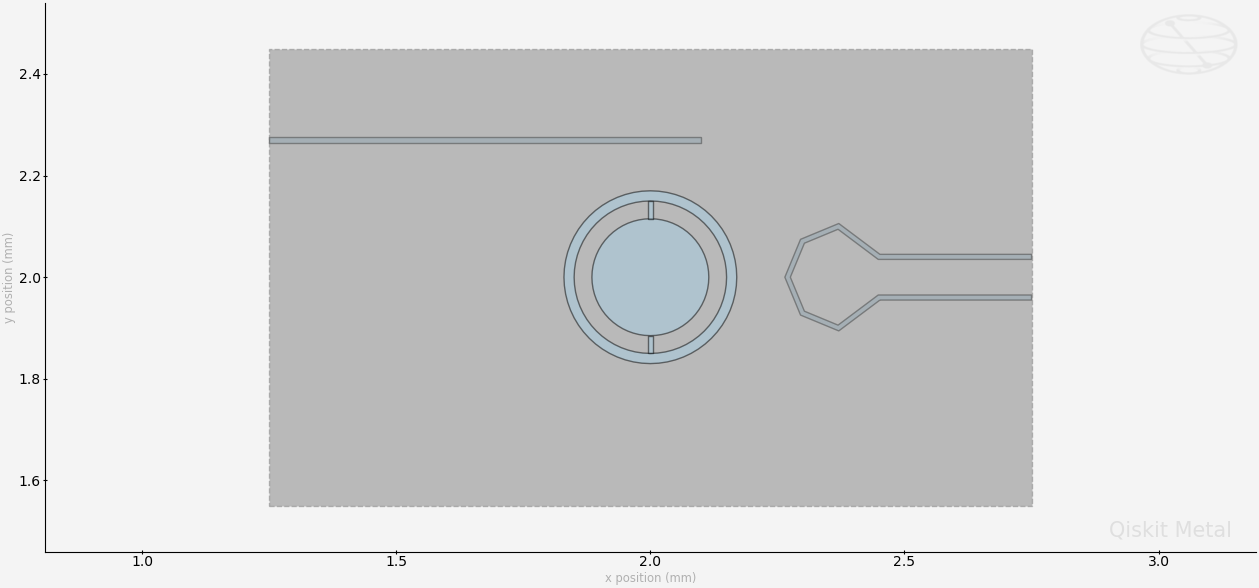
#Save screenshot as a .png formatted file.
gui.screenshot()
[10]:
# Screenshot the canvas only as a .png formatted file.
gui.figure.savefig('shot.png')

from IPython.display import Image, display
_disp_ops = dict(width=500)
display(Image('shot.png', **_disp_ops))
Closing the Qiskit Metal GUI#
[11]:
gui.main_window.close()
[11]:
True
For more information, review the Introduction to Quantum Computing and Quantum Hardware lectures below
|
Lecture Video | Lecture Notes | Lab |
|
Lecture Video | Lecture Notes | Lab |
|
Lecture Video | Lecture Notes | Lab |
|
Lecture Video | Lecture Notes | Lab |
|
Lecture Video | Lecture Notes | Lab |
|
Lecture Video | Lecture Notes | Lab |